Creating a Stackery Environment
We have our existing catalog API running in our AWS account. To modernize it, we’ll create a free Stackery account and an environment we can use it to architect, develop, and deploy a modernized, serverless version of the API.
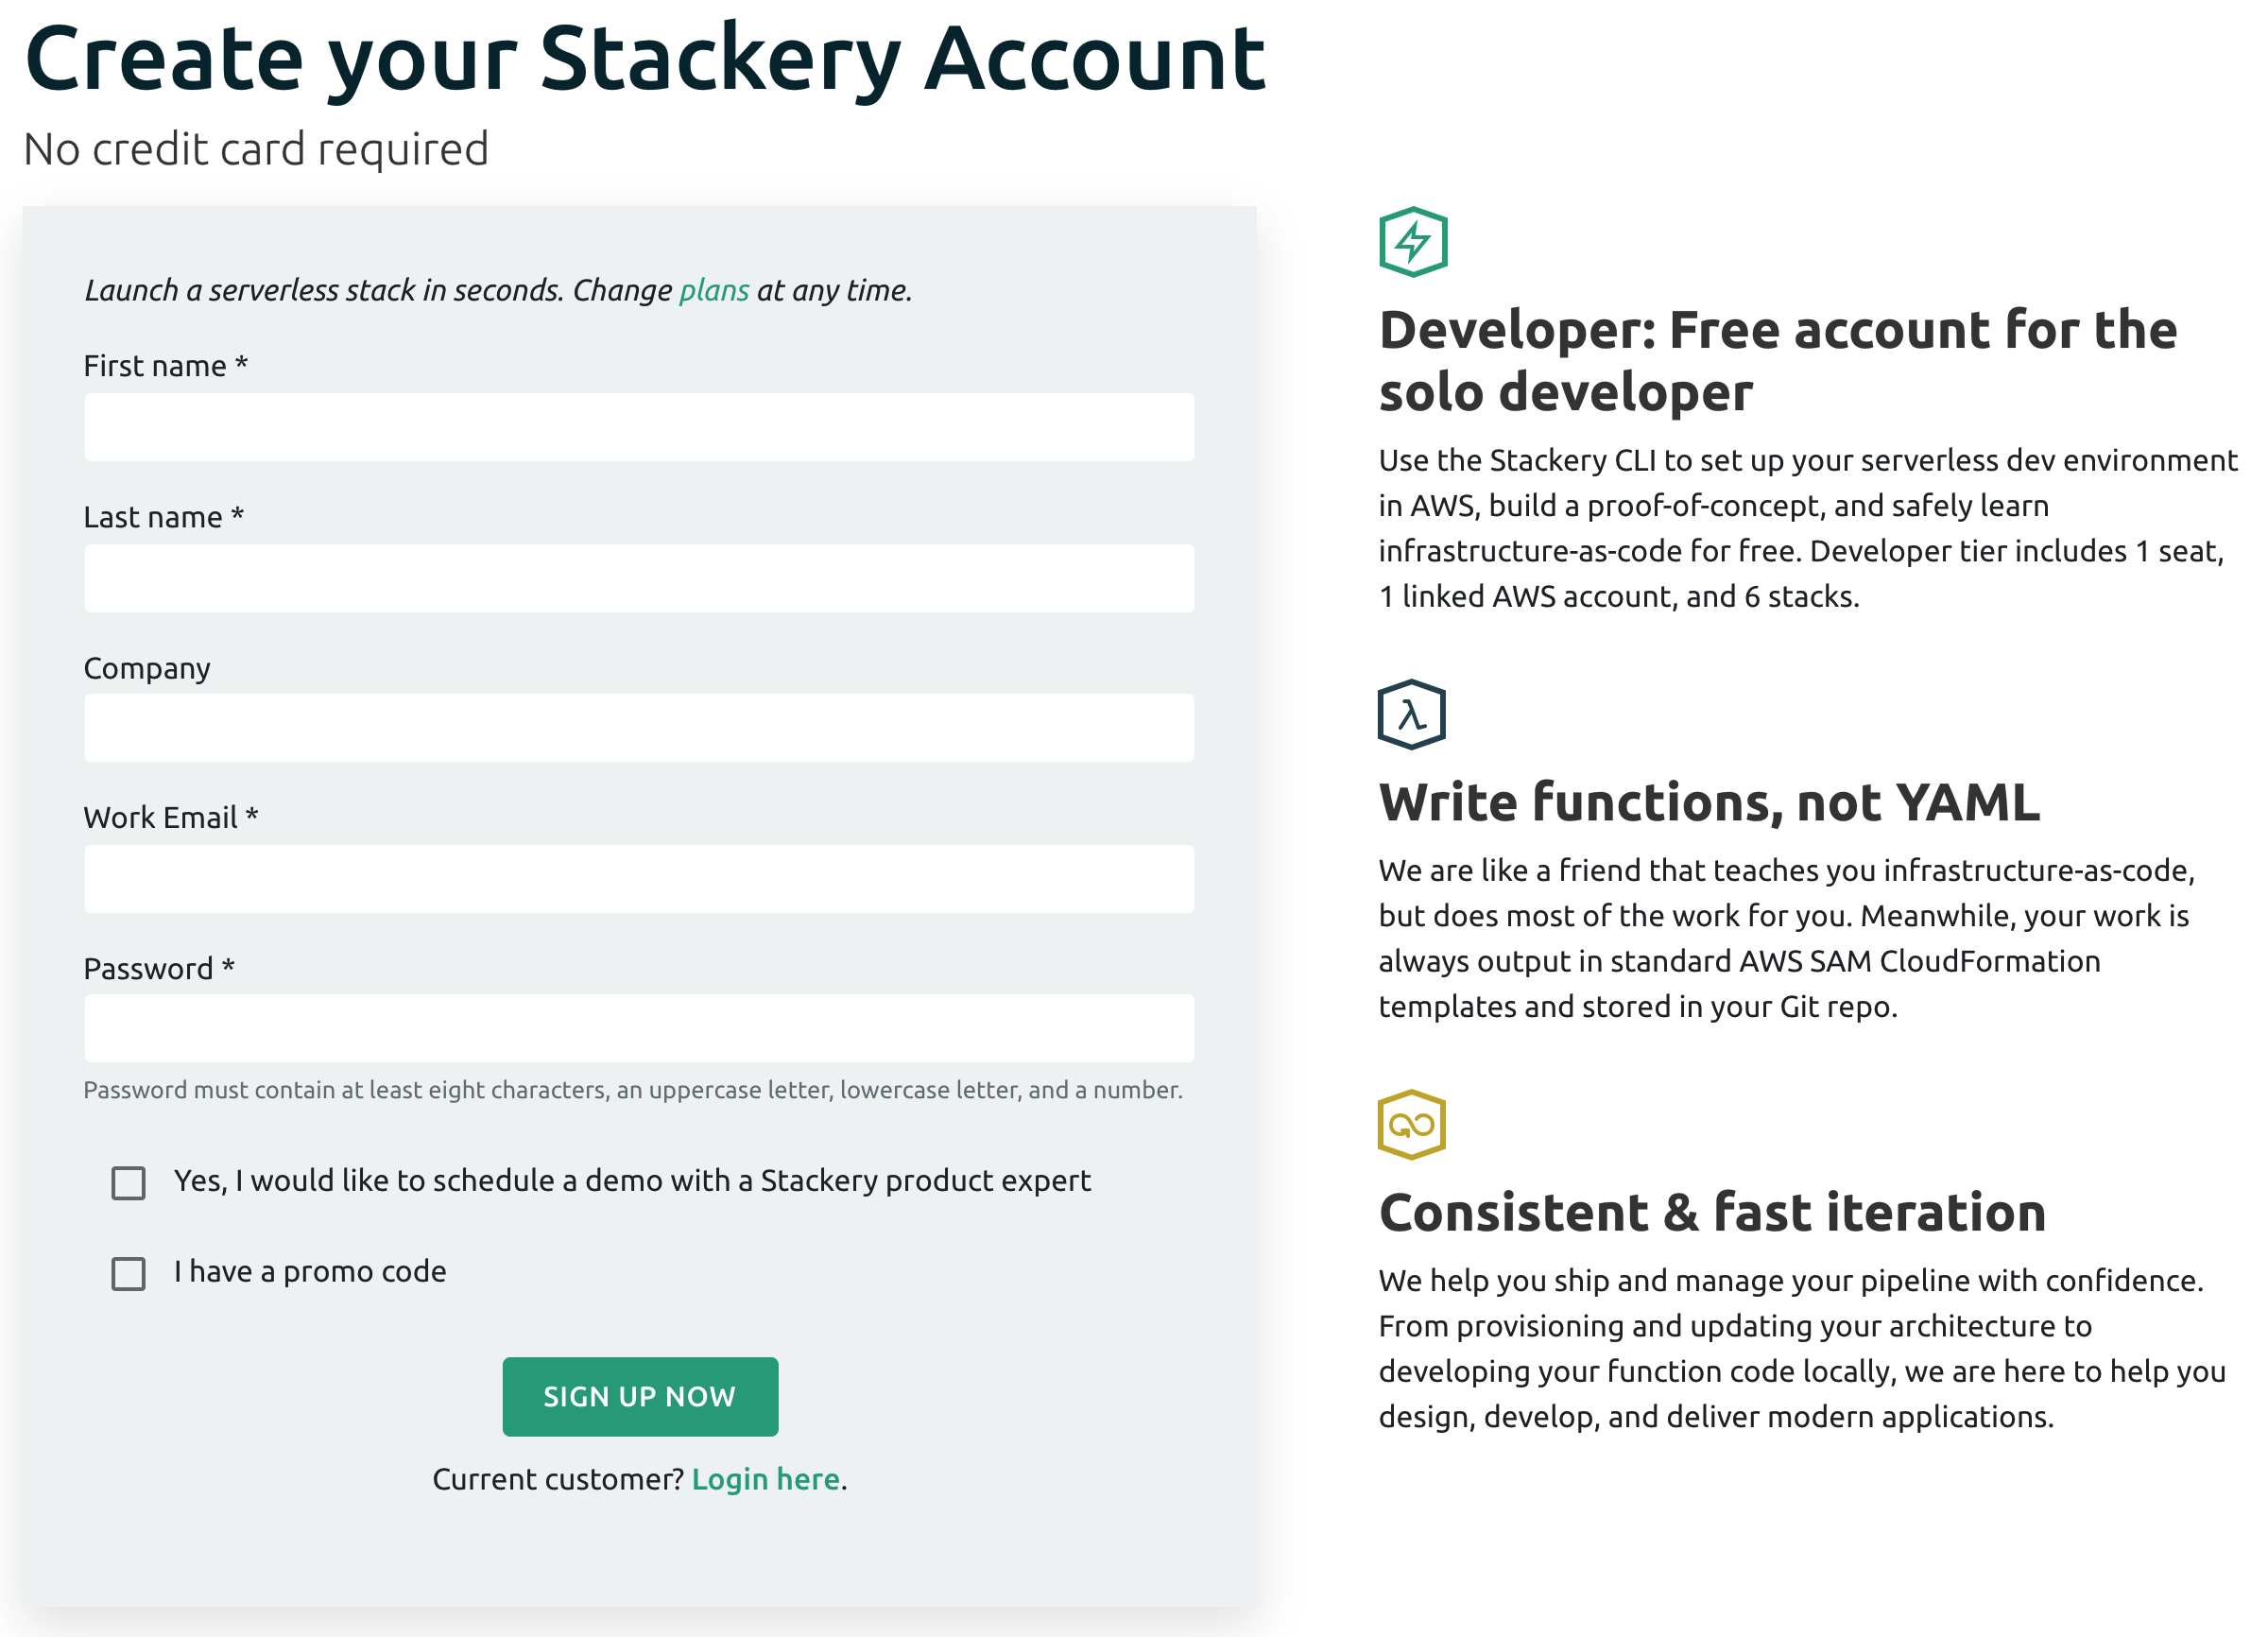
Create a Stackery Account
Click here to sign up for Stackery if you do not already have an account. If you already have an account, sign in at https://app.stackery.io.
Link your AWS Account
Next, we need to link your AWS account to Stackery so it can help us manage our stack and environment we’ll deploy it into. Click on the Link My AWS Account button in the Stackery dashboard if you just created a new Stackery account, or go to the Linked AWS Accounts settings page and click the Link New AWS Account button.
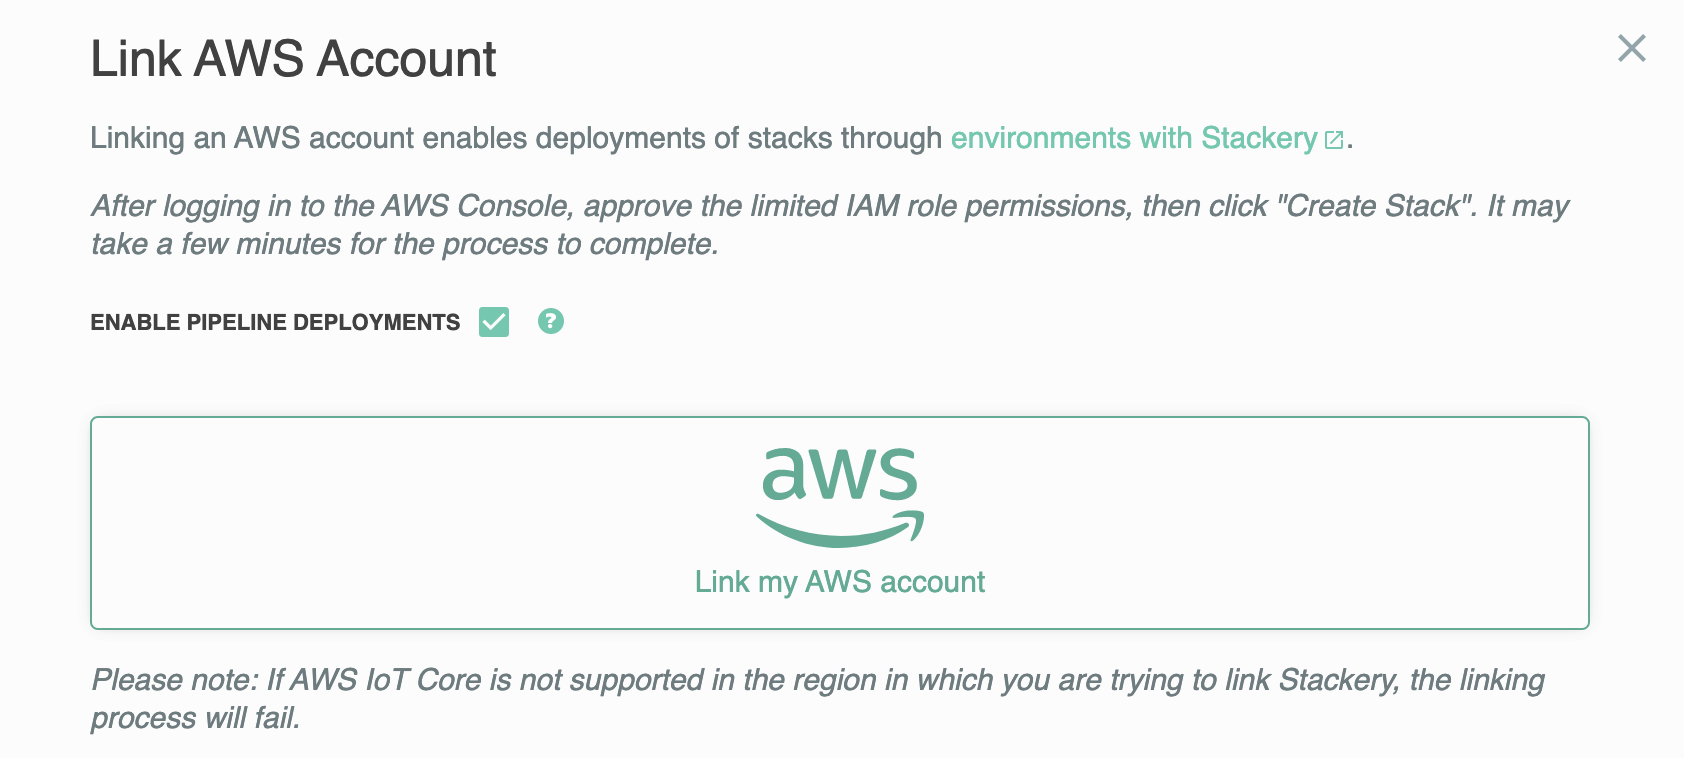
You can optionally choose to enable Stackery’s support for turn-key PR and deployment pipelines by checking the Enable Pipeline Deployments box, but it is not necessary for this workshop.
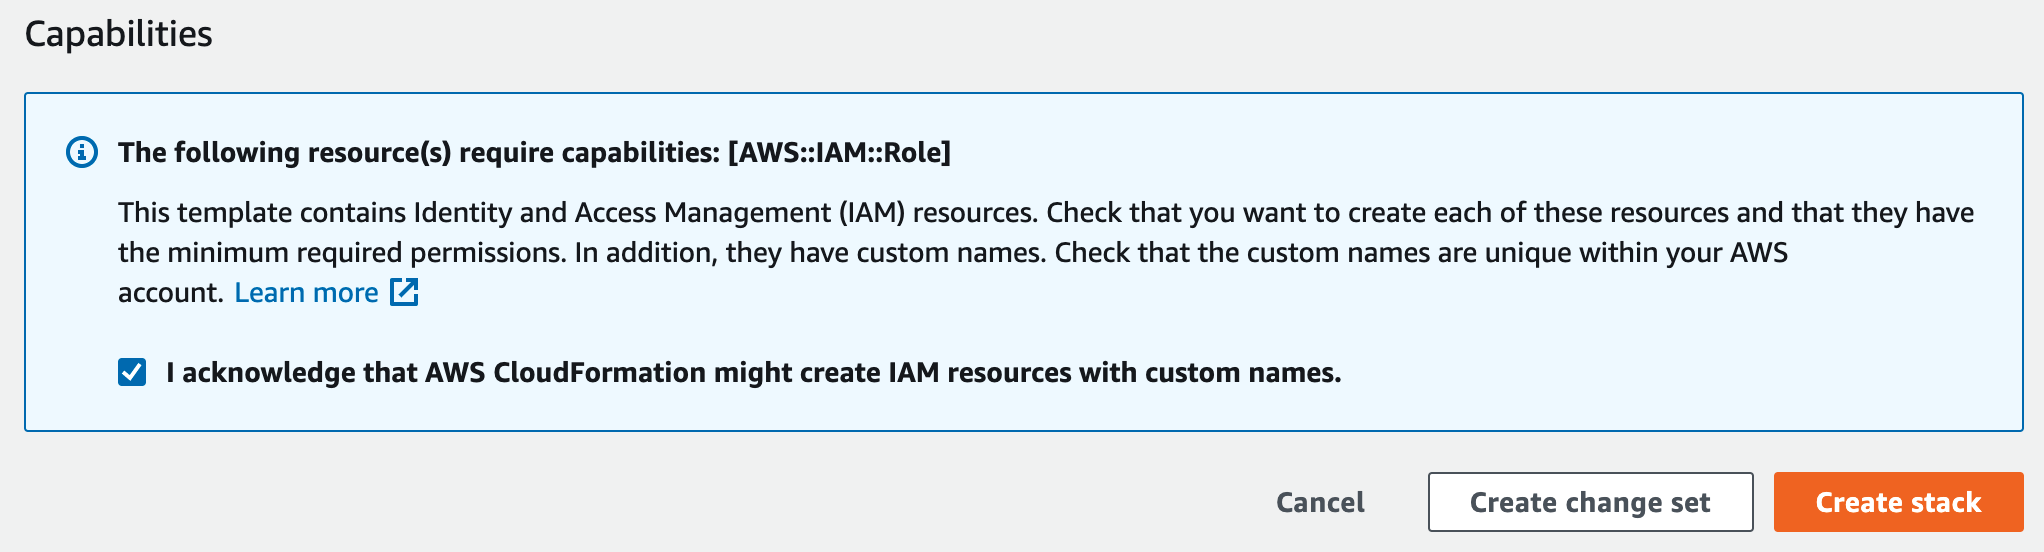
Now click the big Link my AWS Account button. This will take you to the AWS CloudFormation console for your account. Make sure the leave the stack named stackery (changing this will prevent the account linking process from completing successfully). Scroll to the bottom of the page and check the box acknowledging this will create IAM Roles in your account. Then click the Create Stack button.
Navigate to the Events tab for the stack in the CloudFormation console. You can watch the resources needed to link your AWS account with Stackery as they are created. Your account is linked once the stackery stack resource is shown with the CREATE_COMPLETE status.
If any resource fails to be created the stack will rollback, deleting all the previously created resources. Look for error messages for the first failing resource in the events list to determine what went wrong. If you need help resolving the issue please reach out to workshop staff or use the Stackery in-app chat or email support@stackery.io. We’ll help you understand why this step failed and how to resolve it.
Back at the Stackery Linked AWS Accounts page your account should be listed as linked (you may need to refresh if you still had it open in another tab).
Creating a Stackery Environment
We can now create a Stackery Environment. Stackery environments are namespaced locations within our AWS accounts for parameters (stored in AWS Systems Manager Parameter Store), secrets (stored in AWS Secrets Manager), and resources deployed as part of our stacks.
Navigate to the Stackery Environments page. Click the Add an Environment button, select your AWS account from the drop-down, then select the region you are using for the workshop (the region from Event Engine or the region you chose to deploy the existing Catalog API into). Name the environment stackery-demo and click the Add Environment button.
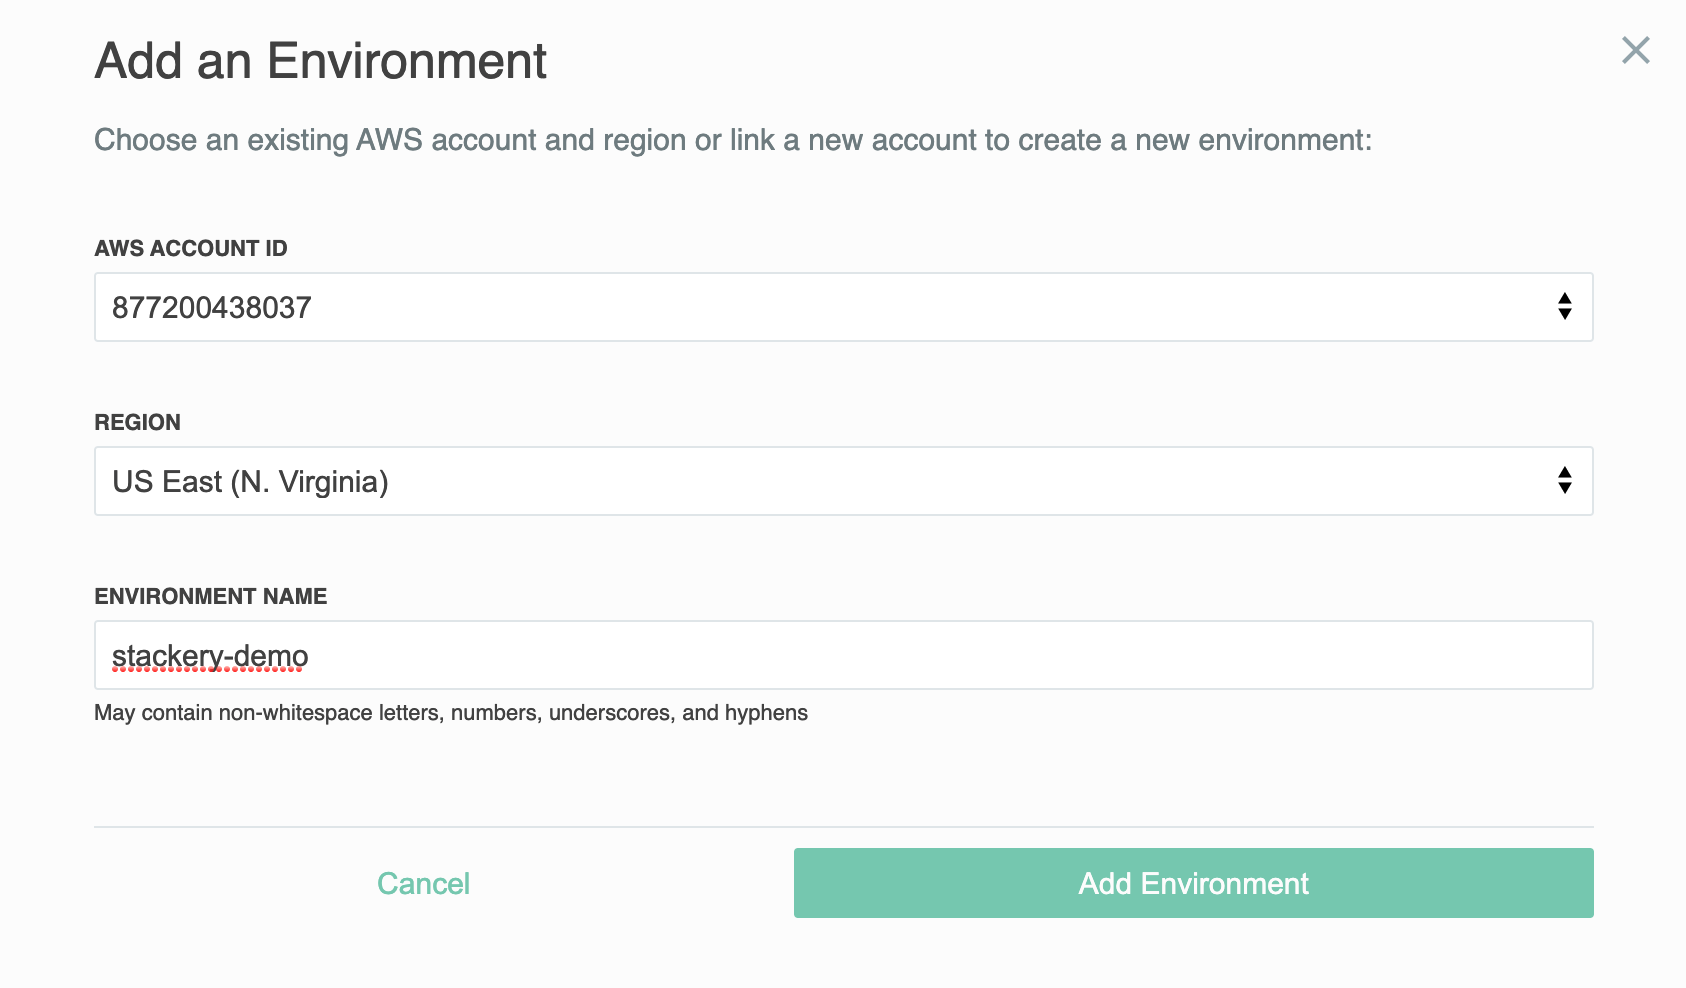
The environment must be named stackery-demo for this workshop. The existing Catalog API exports database credentials and parameters into the stackery-demo environment namespace. Naming the environment something other than stackery-demo will prevent you from completing the workshop as designed.
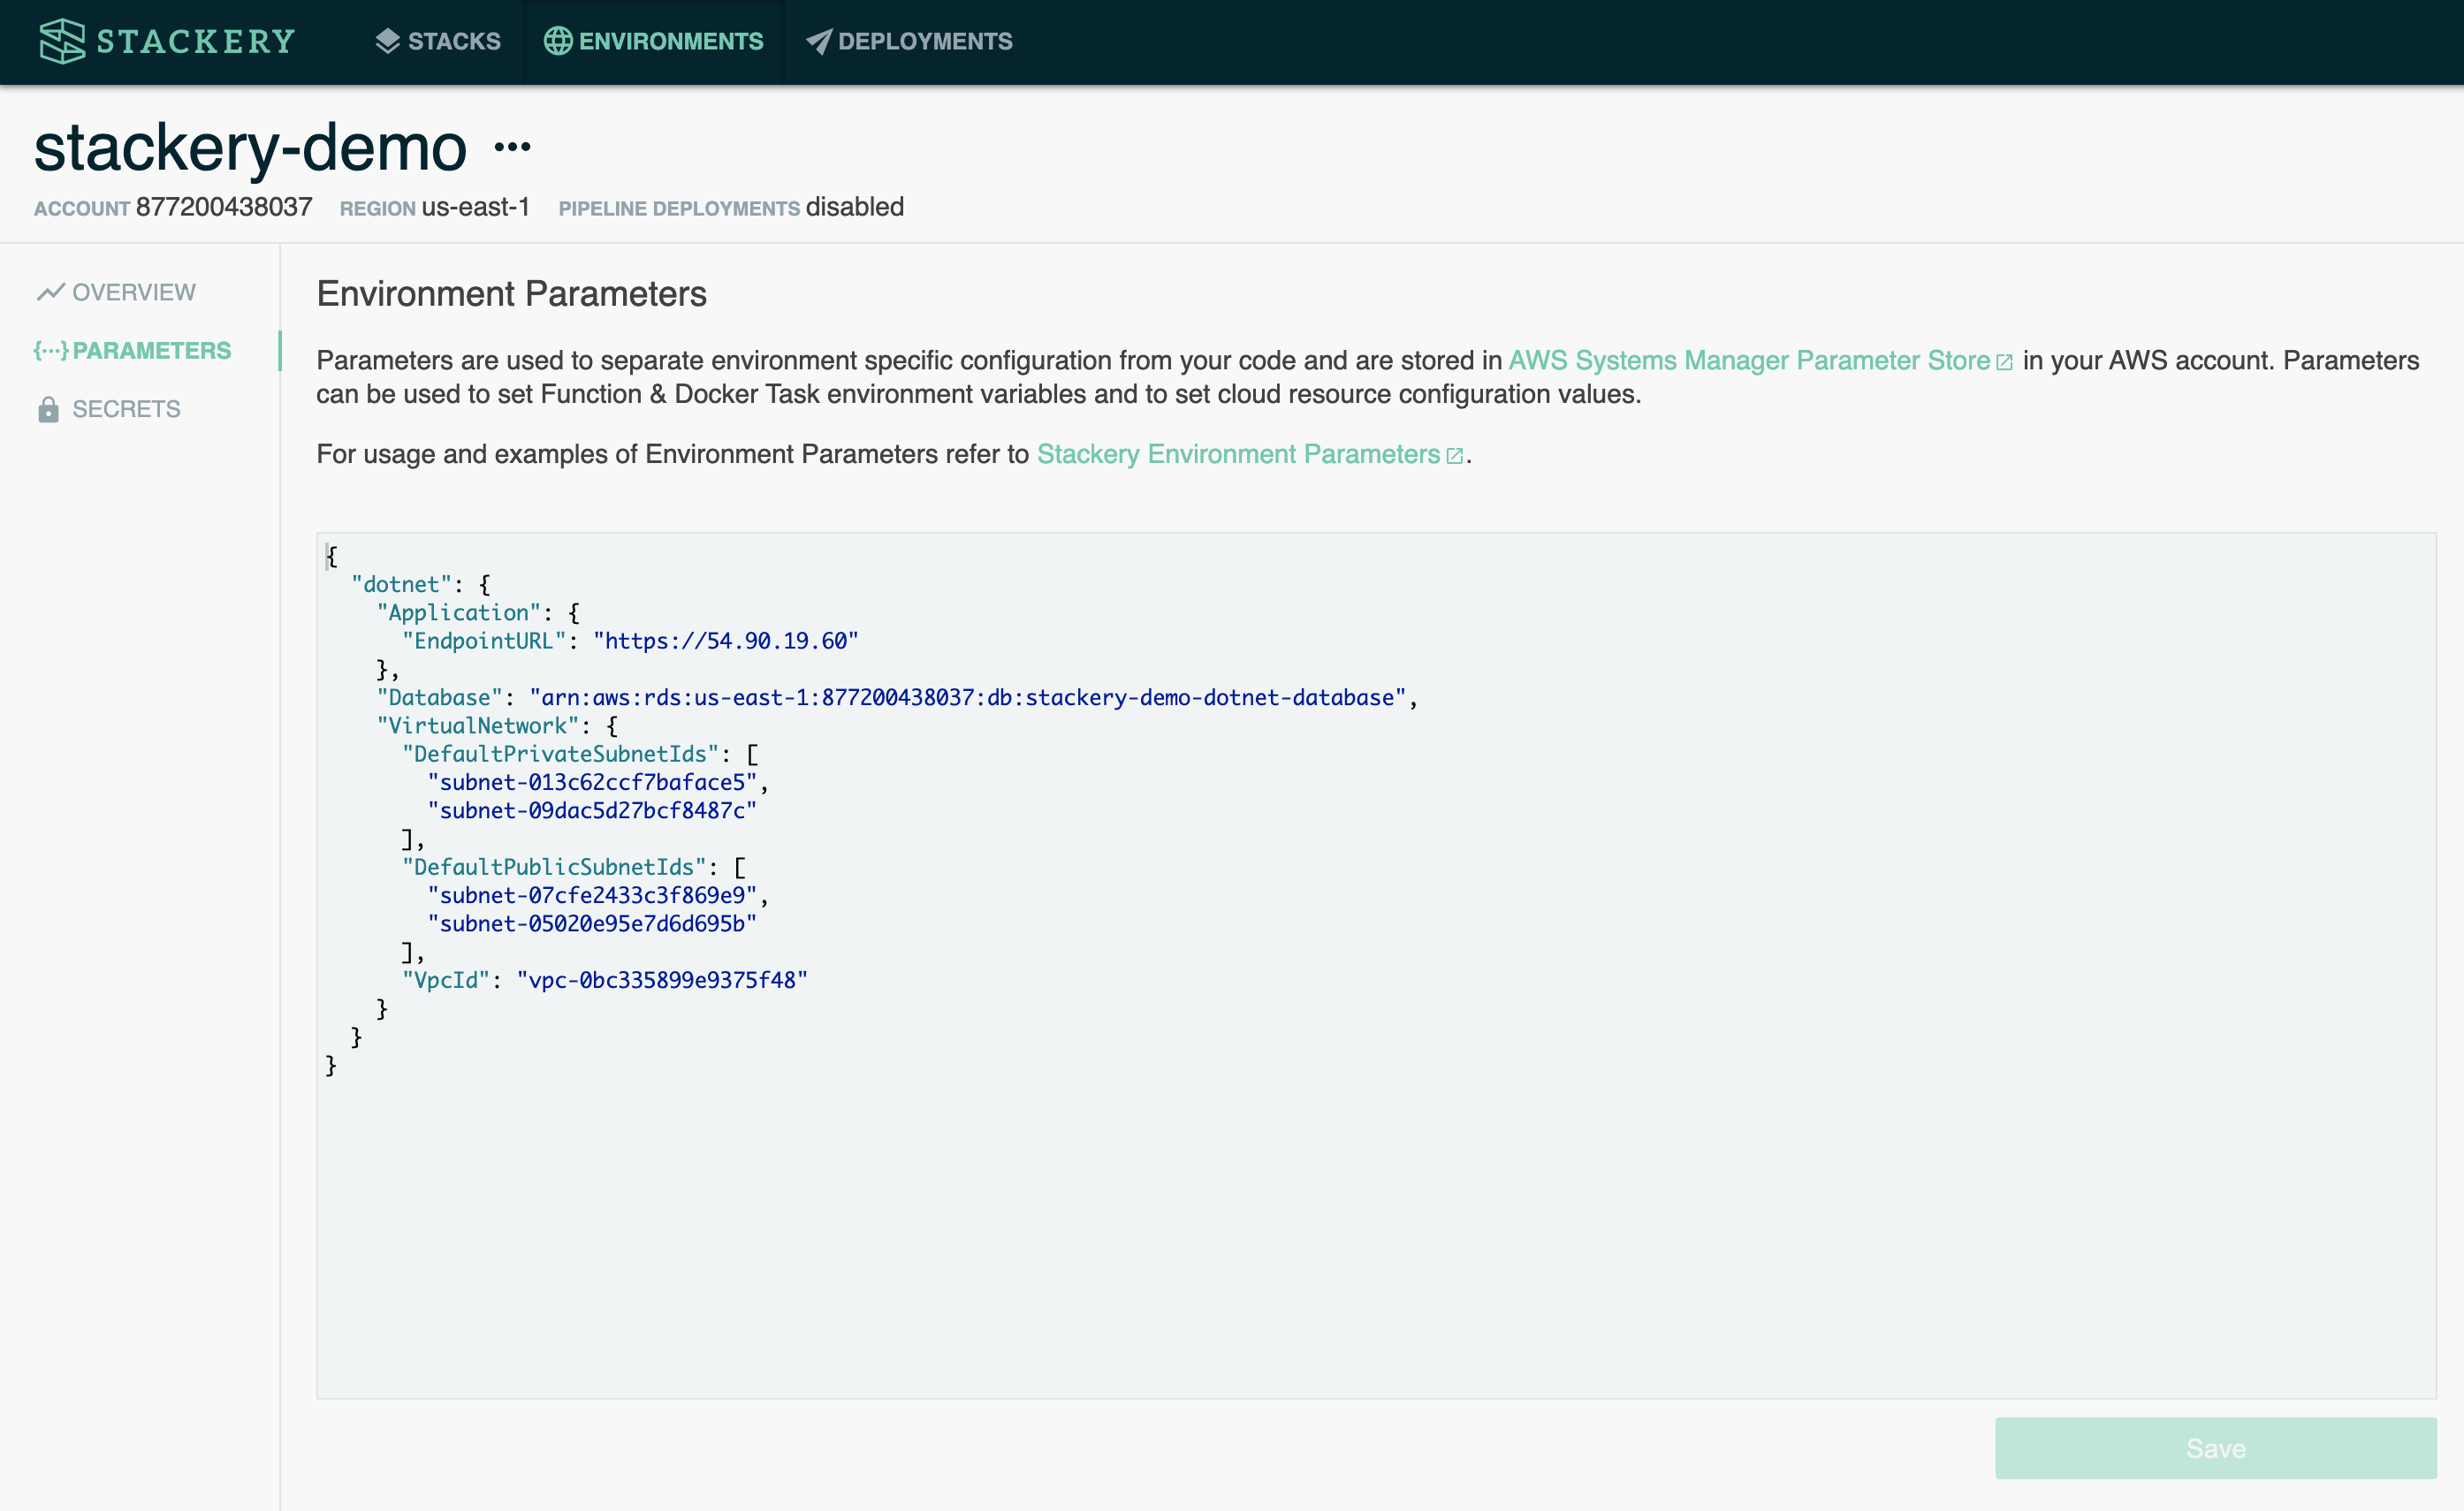
Once the environment is created, navigate to its Parameters page to see pre-populated parameters from the existing Catalog API stack.
Next, navigate to the environment’s Secrets page to see the secret that holds credentials for the Catalog API database.

If you don’t see these parameters or secrets, double check the following:
- The environment is named stackery-demo
- The environment is in the same AWS account you deployed the existing Catalog API into, or the Event Engine AWS account if you are using one
- The environment is in the same AWS region you deployed the existing Catalog API into, or the Event Engine AWS region if you are using one
Once you see these parameters and secrets you can move onto Installing Tools and SDKs!