Modernizing the .NET Application
Up to now we’ve been building infrastructure to serve the /api/books routes using a serverless Lambda Function. But to do this, we need to modernize the original ASP.NET Framework application.
.NET Framework applications use an older, closed-source .NET implementation that only runs on Windows computers. Newer .NET versions (originally named .NET Core, but now just called .NET starting with version 5) are open source and cross-platform, meaning they can run inside Linux-based AWS Lambda Functions.
We’re going to first use a new AWS tool, the Porting Assistant for .NET to transform the foundation of our existing .NET Framework application into a .NET Core application. Then, we’ll manually update slightly trickier bits of code the Porting Assistant didn’t know how to update. Lastly, we’ll add in a package that let’s our ASP.NET application read API requests from Lambda invocation messages and respond with appropriate messages for API Gateway to send back to the client.
Pulling Down the Latest Commit
After forking the initial workshop repository we cloned and checked out the fork. Now let’s pull down the changes we made in the previous module when we created the serverless infrastructure. Use your favorite IDE or tool to pull down the changes, or run the following in a terminal:
git pull origin mainRunning the AWS Porting Assistant for .NET
Merge Prepared Changes
The Porting Assistant only runs on Windows at the current time. If you are on another OS or want to skip installing and running the assistant during the workshop you can merge in changes it would have made by running the following in your local checkout of your stack: git merge origin/partially-ported. (In case you get stuck in Cloud9’s VIM editor during the merge process, try these keybinding instructions to save your file and exit.) Then continue to the Manual Updates section.
Run AWS Porting Assistant for .NET on Windows
If you don’t have it installed already, download and install it from the AWS Porting Assistant for .NET website. You will also need AWS credentials for the porting assistant. Use your favorite text editor to open .aws\credentials in your user home directory and add a profile for your AWS account. If you’re using Event Engine you can find the profile values in the Event Engine workshop page. Otherwise, you can follow the instructions in AWS’Configuration and credential file settings documentation. It should look something like the following, though you may not have aws_session_token or region values:
[default]
aws_access_key_id=AKIAIOSFODNN7EXAMPLE
aws_secret_access_key=wJalrXUtnFEMI/K7MDENG/bPxRfiCYEXAMPLEKEY
aws_session_token="IQoJb3JpZ2luX2VjEAkaCXVzLXdlc3QtMiJIMEYCIQCxbcBbg+GJuiCNzKhBSFrnlRpwgUjnecLxjEIb9xK9/gIhAKuVr4n8TiPWW2Vydn6J5SJVvb7WAM8uagAZTdH5jELEKpQDCML//////////wEQABoMNDU5NTMxMjU2MzM1IgzKhmrF/Rd7EQtyB8Yq6AIpz9Uv9RhWT8cr8Cv+V+8bvUm80k16g8ME1Hanyjjo9G4HCwBkiyzbj5CoXmyKnepJ5bEeYtlRkdVmnoSd5njsUobw4nPa8KaZCjrTSfdEsXMOZlIIhGSWXBUnu1XMVpCV6KK0DQ1wnpHO8CmxC9ZWar00Oi9ka6zeuZWm7FcEIkdIE6TQbW13uIP2+1GV0lHR7CR154yjs/oFz1xwHfzu0zYb1WLWh9OEO342Ouf+k84a3lAXnB7LpLoFPJnetzvMjOfcj6pN+7JhmU4ZrG5OsqG5T978wOEZpOKg2b2ZewzYJjJcRkY5aeZGaA0xy+PS4z8PBN2FsuMjYVBw7n7IZFnQv1F8S7scJfmP2DL2Ctat8MZa1uFUPp1QPXX1aX6hc33Qet/SM2mTgJShKkk+X1SLgX1FztejgFhspwAxGnwkbnObSTktsw6THdieVTOmajMQLZSKrxKuXuGsOym5NZoBa2+j2D0wg8rC/wU6pQHgdo0OHX1CmCTnHx13jIEDRHZ9fFRASLrVkHnWtas20d8bDQe/lGMBbo7uBjLowQPbxUC4a3EuY6AI90mI7+ZHnZDQhjOOfXOnOA7eXXmW3zzkJo8r3qcC7Oex1ZRPlSJIu3q8yD9wEoX3zSW96gYN05ZkAfx+A3UZUWmhNE+ASuYYl/7FWv56PjIi7XLOWMzvh1HG7Hdt4qoVJXE7iit8LGtt6Kw="
region=us-east-1
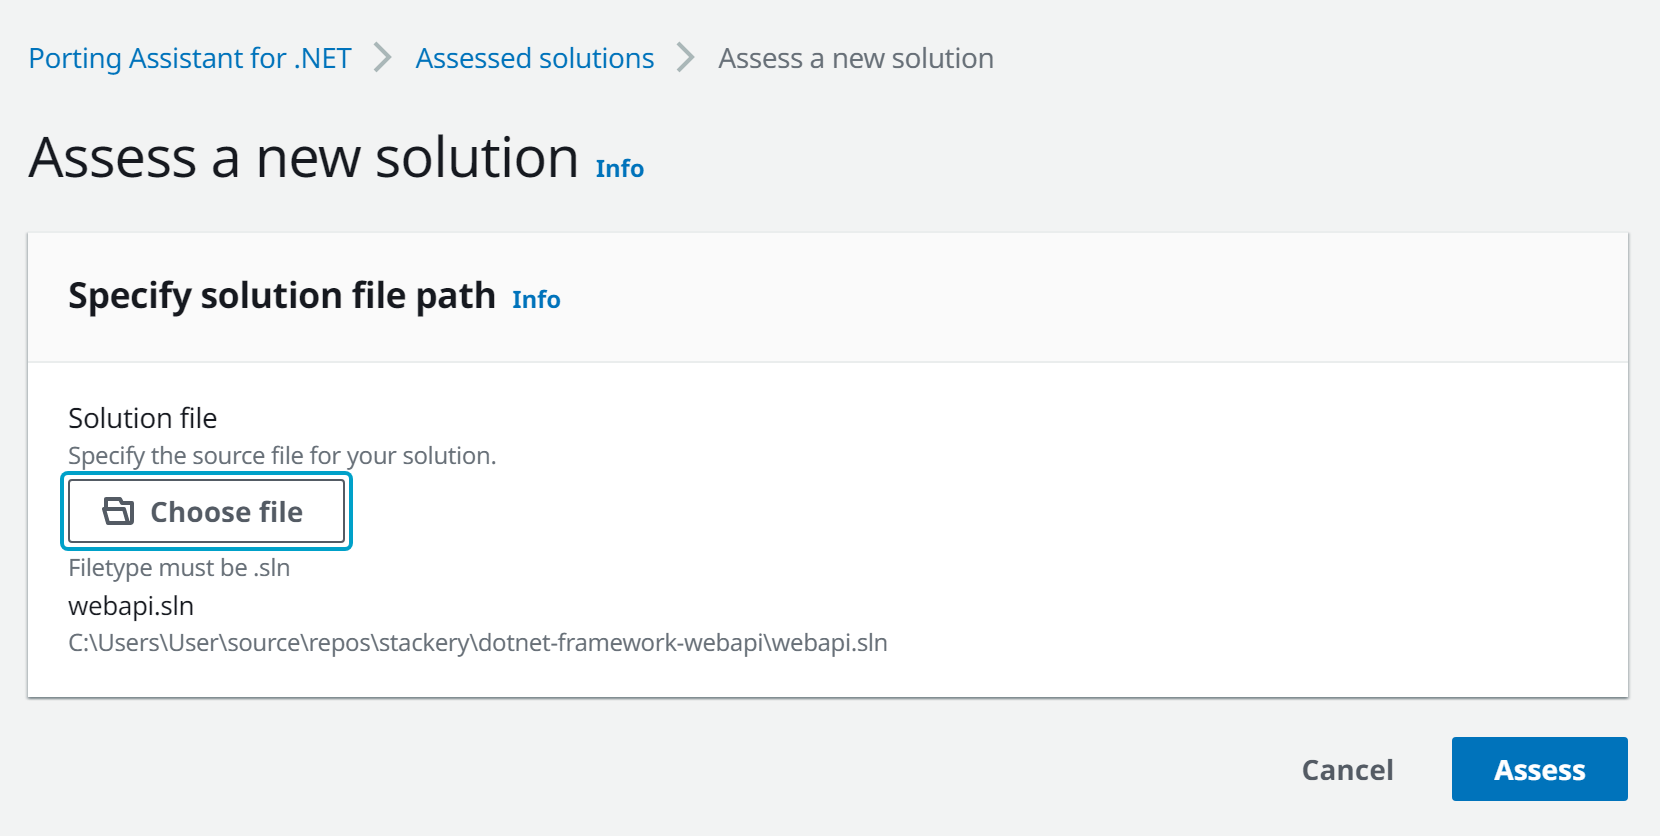
Start the assistant and click the blue Asses a new solution button. Choose the solution file webapi.sln from your local checkout of your Git repo and click the Assess button.
The assessing process should take less than a minute for this app. When it finishes click on the webapi name/link in the assessed solutions list. You can see a bunch of interesting details about the solution. When you’re ready click the blue Port solution button at the top right. Choose to Modify source in place so the changes are part of our local Git checkout. Make sure the New target framework version is set to .NET Core 3.1. If it is set to something else, go to the global settings for the porting assistant to change the target framework version. Click the blue Port button at the bottom of the screen.

Again, the porting process should take less than a minute for this app. You can view the porting log to see details of what the assistant did.
Manual Porting Updates
The porting assistant did a bunch of important conversions for us, but we still need to manually update some bits of the code for .NET Core 3.1. We hope these changes will be somewhat self-explanatory for those familiar with .NET, and provide a sense of the scope of what manual changes look like when porting an application.
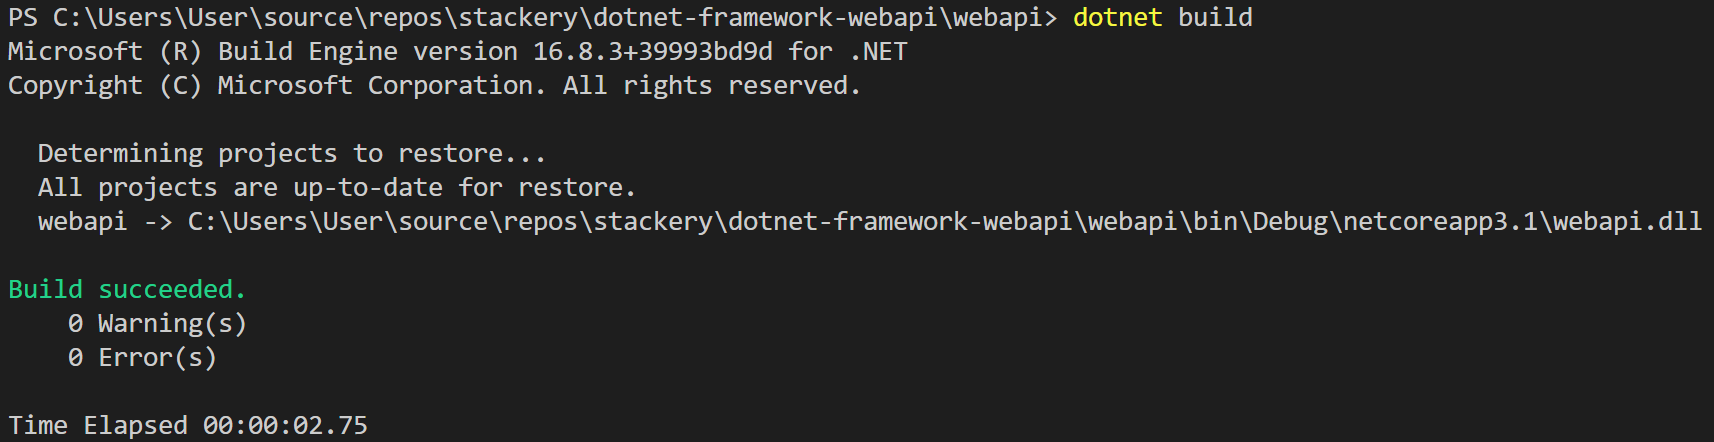
First, let’s verify the state of the application after the porting assistant has run. In a shell prompt (VS Code has one built-in that you may find handy) within the webapi directory of your checked out source code run:
dotnet buildYou’ll see a bunch of angry, red errors. As we manually update the code feel free to re-run the dotnet build command to see how many errors remain.
Manual Porting Update List
- Delete webapi/Controllers/AuthorsController.cs. We are only modernizing the Books routes at this time, and we can freely delete this code that won’t be used.
- Delete webapi/Data/webapiInitializer.cs. We don’t need to initialize our database, it already exists.
- Still within the
webapidirectory, install a newer AWS .NET SDK for Secrets Manager:dotnet add package AWSSDK.SecretsManager. The porting assistant doesn’t port most packages forward, and we need a newer version compatible with .NET Core 3.1 anyways. - Re-install the Newtonsoft.Json package:
dotnet add package Newtonsoft.Json. - Install the Entity Framework Core driver for SQL Server:
dotnet add package Microsoft.EntityFrameworkCore.SqlServer. - Open up webapi/Data/webapiConnectionStringBuilder.cs. This class fetches the database address from the DB_ADDRESS process environment variable we created when we connected our Function with our Database in the canvas earlier. It also fetches the database credentials from AWS Secrets Manager.
Modify the following code on lines 29-32 which uses synchronous AWS SDK methods that do not exist in the newer AWS .NET Core SDK:
var response = client.GetSecretValue(new GetSecretValueRequest
{
    SecretId = Environment.GetEnvironmentVariable("DB_CREDENTIALS_SECRET_ARN")
});
to
var responseTask = client.GetSecretValueAsync(new GetSecretValueRequest{SecretId = $"{Environment.GetEnvironmentVariable("SECRETS_NAMESPACE")}dotnet/Database/SAUser"});
var response = responseTask.GetAwaiter().GetResult();
- Open up webapi/Data/webapiContext.cs
- Delete the constructor method
webapiContext()on lines 7-10. - The .NET Porting Assistant gets confused about the
DbSetclass because there’s one definition of the class in the System.Data.Entity namespace, but that’s not the right one. You need to remove the textSystem.Data.Entity.in front ofDbSeton lines 7 and 13 to fix the erroneous namespace. Insert the following line at the top of the
OnConfiguring()method to tell the Entity Framework how to connect to the DB:optionsBuilder.UseSqlServer(webapiConnectionStringBuilder.ConnectionString);
- Delete the constructor method
- Open up webapi/Controllers/BooksController.cs
The C# extension for VS Code adds Intellisense shortcuts. If you’re using it, start by hovering over the
usinglines at the top of the file that are shaded. Click the lightbulb icon that pops up and selectRemove Unnecessary Usings. Also removeusing System.Data.Entity.Infrastructure;. Intellisense thinks it may be used but it isn’t. If you aren’t using VS Code and Intellisense, remove the following lines:using System; using System.Collections.Generic; using System.Data; using System.Data.Entity; using System.Data.Entity.Infrastructure; using System.Linq; using System.Net; using System.Net.Http; using System.Threading.Tasks; using System.Web.Http; using System.Web.Http.Description; using webapi.Data; using webapi.Models;and replace them with:
using System.Linq;
using System.Net;
using System.Threading.Tasks;
using webapi.Data;
using webapi.Models;
using Microsoft.EntityFrameworkCore;
using Microsoft.AspNetCore.Mvc;
Each route method will be added to a base path for the controller. Add the following decorator above the
[ApiController]decorator:[Route("api/[controller]")].Each route method needs an updated decorator to denote its REST API route path and parameters:
- GetBooks(): Insert
[HttpGet]above the method. - GetBook(): Replace
[ResponseType(typeof(Book))]with[HttpGet("{id}")]. Decorate PutBook(), PostBook(), and DeleteBook() with similar decorations:
/* PutBook() */
[ResponseType(typeof(void))] -> [HttpPut("{id}")]
/* PostBook() */
[ResponseType(typeof(Book))] -> [HttpPost]
/* DeleteBook() */
[ResponseType(typeof(Book))] -> [HttpDelete("{id}")]
- GetBooks(): Insert
Search and replace
IHttpActionResultwithActionResult, but forGetBook(),PostBook(), andDeleteBook(), where we need to return a Book record, replace it withActionResult<Book>.Find the erroring usage of
StatusCode(HttpStatusCode.NoContent)on line 67 (after the above changes) and replace it withNoContent()Delete the
Dispose()method, which is no longer necessary.
Run dotnet build once more to confirm the project builds cleanly!
API Gateway / Lambda Integration
We’ve updated our application to run on .NET Core, but there’s one last step to be able to run this serverlessly in an AWS Lambda Function in response to an API Gateway request. We need to add some code that will be invoked when the function runs, read in the HTTP request from the JSON event passed in, route it through the ASP.NET framework, and format the response into the JSON form expected by API Gateway.
Thankfully, there’s an existing AWS project that handles this for us. You can find out more in the documentation for the Amazon.Lambda.AspNetCoreServer package. Follow the steps below to add it to the application.
- Install the package:
dotnet add package Amazon.Lambda.AspNetCoreServer. Add a new file webapi/LambdaEntryPoint.cs and add the following code:
using Microsoft.AspNetCore.Hosting;

namespace webapi
{
    /// <summary>
    /// This class extends from APIGatewayHttpApiV2ProxyFunction which contains the method FunctionHandlerAsync which is the
    /// actual Lambda function entry point. The Lambda handler field should be set to
    ///
    /// webapi::webapi.LambdaEntryPoint::FunctionHandlerAsync
    /// </summary>
    public class LambdaEntryPoint : Amazon.Lambda.AspNetCoreServer.APIGatewayHttpApiV2ProxyFunction
    {
        /// <summary>
        /// The builder has configuration, logging and Amazon API Gateway already configured. The startup class
        /// needs to be configured in this method using the UseStartup<>() method.
        /// </summary>
        /// <param name="builder"></param>
        protected override void Init(IWebHostBuilder builder)
        {
            builder
                .UseStartup<Startup>();
        }
    }
}
The above class and method implement the Handler entrypoint we specified when we created our Function resource earlier.
Try running dotnet build again to confirm it builds successfully.
If you have any issues or want to double check your work you can see the full solution in the final branch of the workshop repository. In particular, this commit contains all the code changes from this page of steps.
Commit Changes
Use your favorite tools to commit and push up your changes to your Git repository. Make sure to tell git about the new files you created and the files that no longer exist. If you prefer, you can use the following commands to do this:
# Get all the updates for existing files and the deleted files staged for the commit
git add -u
# Stage the new files
git add webapi/LambdaEntryPoint.cs webapi/Program.cs webapi/Startup.cs webapi/appsettings.json
# Commit the files
git commit -m 'Ported and modernized'
# Push the current branch up to your repository
git push origin HEAD
Now it’s time to deploy and test our API!